
EC2 : Basic Hands On
March 20, 2024

Tamilarasu Gurusamy
AWS Hands On
1 / 2 Parts
Objective
We wil be deploying Apache Web Server with a simple html page on an EC2 instance using AWS Console
Setup EC2
Navigate to the EC2 Page
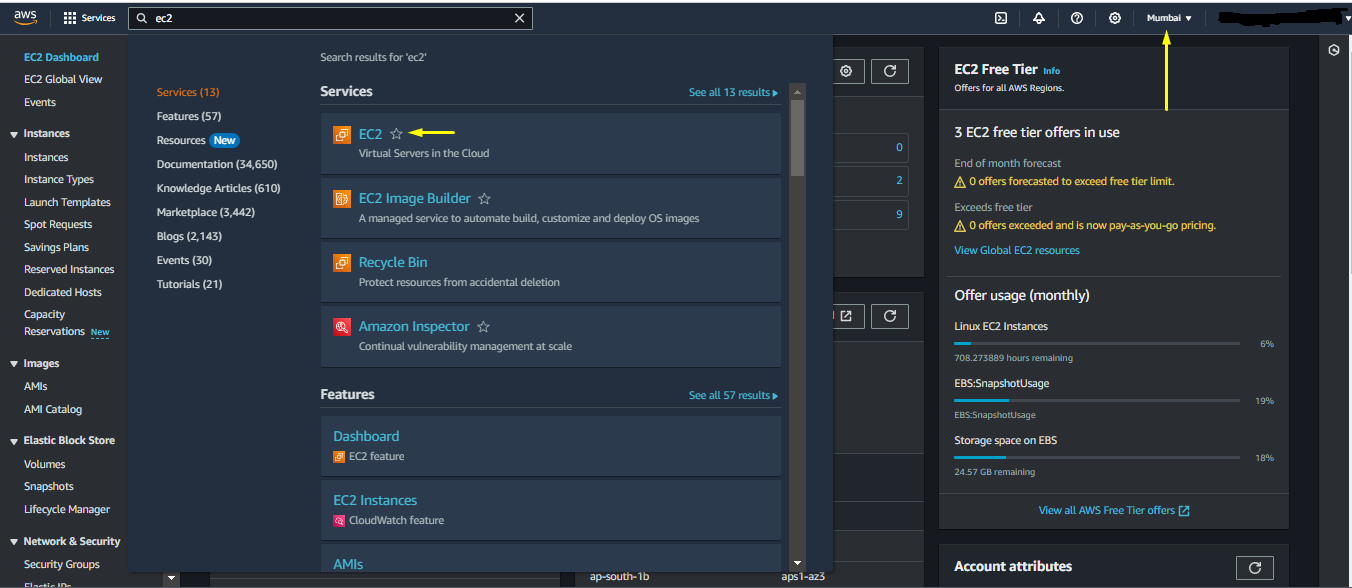
EC2 Page in Search Bar
- Go to EC2 Instance Page using the Search Bar at the top. There you can search for any service provided by AWS
- Make sure to choose the closest region to you in the upper right corner to avoid latency issues
Click on Launch Instance
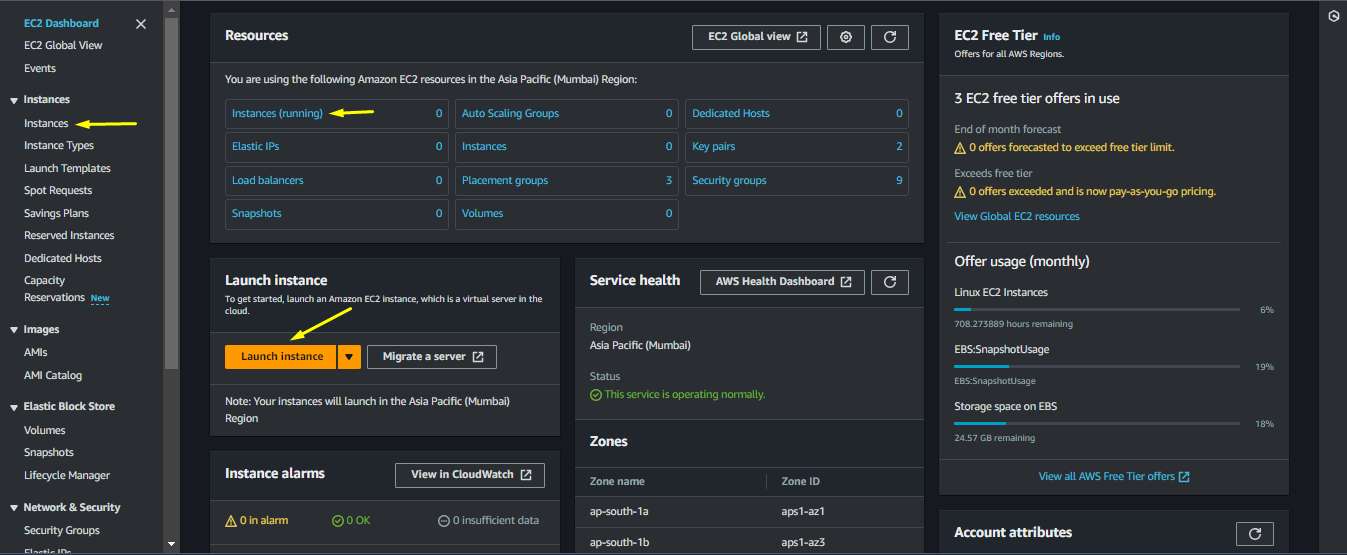
Launch EC2 Instance Page
- We can choose any of the option highlighted in the above image, as it will all lead to the same place as in the next image
- For now click on
Launch Instancebutton
Give a name for the Instance

Name for the EC2 Instance
Give a name for the EC2 Instance that will be deployed, as it can be used for reference later
Select the AMI (Amazon Machine Image).

AMI Selection
AMI is basically the Operating System that will be running on our EC2
Select Instance Type
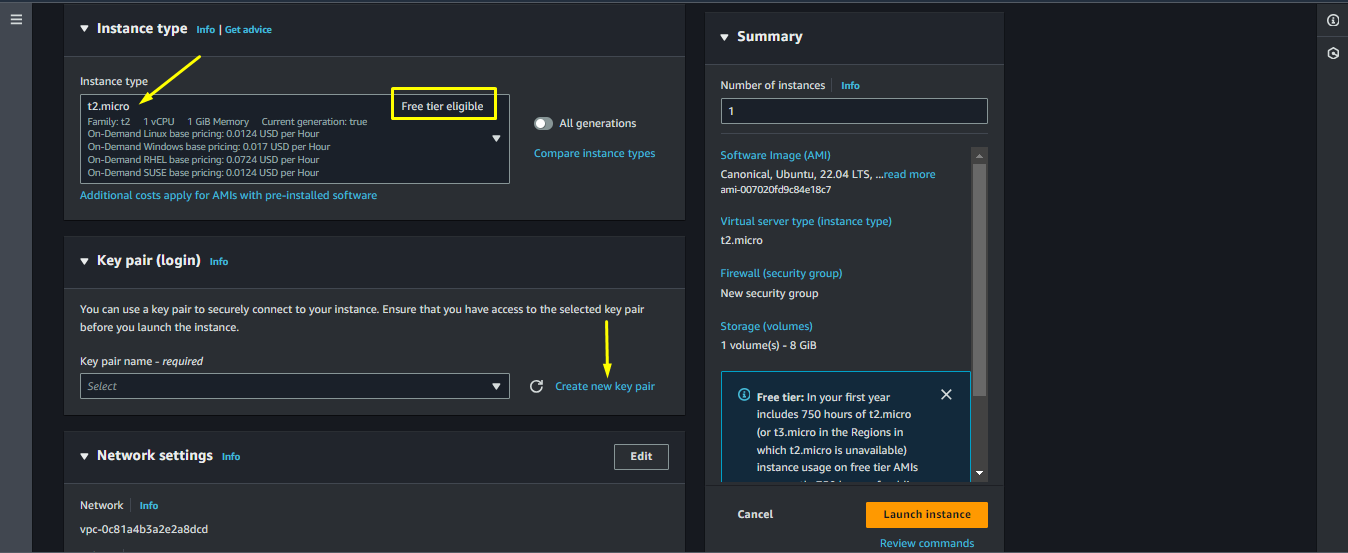
Instance Types
- There are many types of instances, each suited for different type of purpose
- For example
- High Performance Computing
- Storage Intensive tasks
- Since we do not have such requirements and to stay in the Free Tier, we go with the
t2.microInstance Type - For the next step click on
Create new key pair
Select / Create a Key Pair

Generate Key Pair
- Give a name for the key pair
- For now do not worry about other settings and click on
Create key pair - Save the key in your desired location
- These keys are used for additional security to connect to the EC2 instance, since it is generally not recommended to use passwords
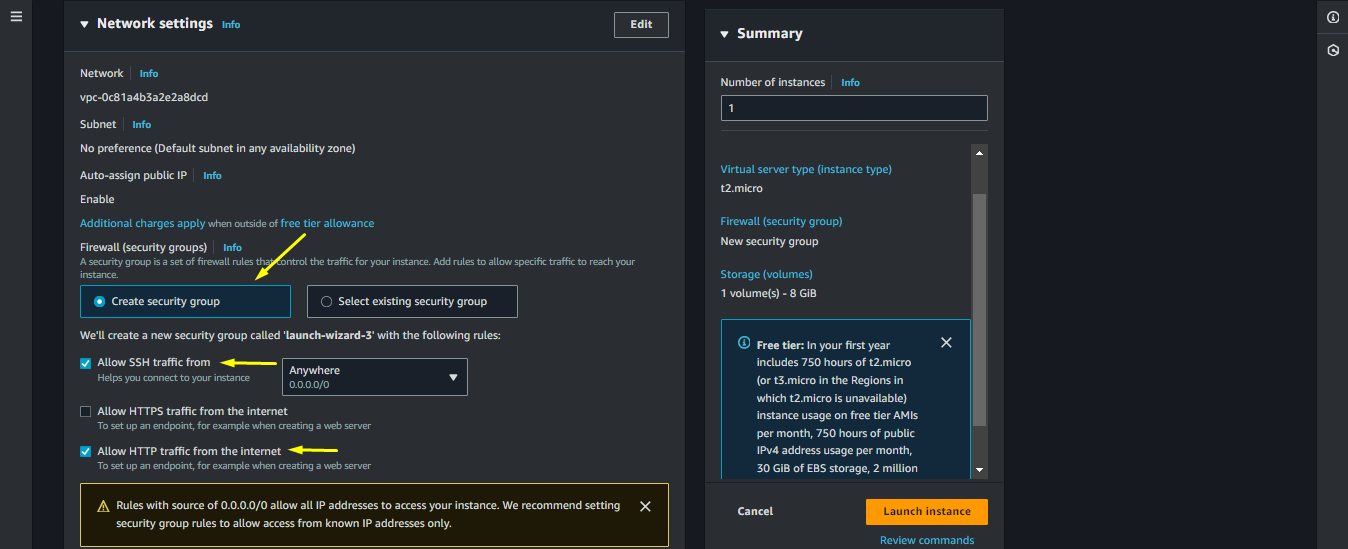
Create or Select a Security Group
Key Pair
- Security Groups are firewall around EC2 which needs to be configured
- There are default security groups, but for our demo, we will create a new one
- Click on Create security group
- Check the option
Allow SSH fromto get access of the shell of the EC2 instance - Also check the option
Allow HTTP traffic from the internet, as we will need it to access the webpage
- Check the option
Configure Storage

Storage Options
- We need to configure the root volume for the EC2 instance, where all the data will be stored
- Although Free Tier allows 30GB of storage, we will only take 8GB for now
- GP2 is the storage type, which is allowed in the Free Tier
- For next step, click on Advanced Details
Provide UserData and Launch Instance

User Data
- User Data contains the script which runs on the first boot of the EC2 Instance
- Here we provide the script to install the Apache Web Server
			#!/bin/bash
sudo apt update
sudo apt install apache2 -y
			#!/bin/bash
sudo apt update
sudo apt install apache2 -y
- There is an option for launching multiple number of instances with the same configuration, but since we dont need it right now, we will keep it default
- After pasting the script, click on Launch instance
EC2 Launch Complete
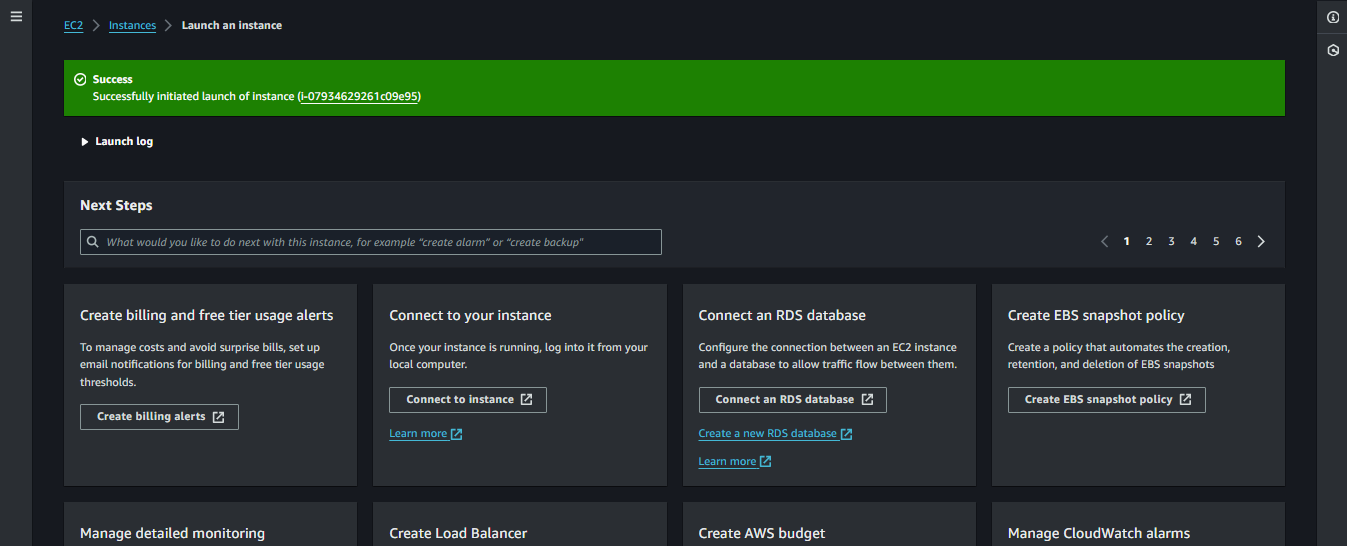
EC2 Launch Completed
- After a while you will be landing on a page like this
- Click on the Instance ID and proceed to the next step
SSH Into the Instance

EC2 Instance Before Connect
- This is the page that contains all the details about the instance that we launched a while ago.
- It contains details like
- Public Ipv4 Address : Used for accessing the instance from outside the AWS
- Private Ipv4 Address : Used for accessing the instance from other services inside the AWS
- Click on
Connectbutton to proceed
Ways to Connect to EC2 Instance

EC2 Instance Connect Page
- This page provides us with the different ways of connecting to the EC2 instance
- We will be currently using EC2 Instance Connect
- Click on
Connectbutton to proceed
Setup Apache Web Server
Shell Access

EC2 Instance Shell
- This page gets us access to the shell of the EC2 instance
- Marked area is where we can enter the commands
Prepare the index.html file

Before Vim
Enter the following commands in the shell
Navigate to the directory
/var/www/html
cd /var/www/html
cd /var/www/html
- Upon listing the contents in the folder, we can see an
index.htmlfile
ls
ls
Edit the index.html file using the favourite editor of your choice. I will be using Vim
Open index.html file using vim
sudo vim index.html
sudo vim index.html
Press
ito edit the fileReplace the existing contents of the
index.htmlfile with the following html code
			<!DOCTYPE html>
<html lang="en">
<head>
    <meta charset="UTF-8">
    <meta name="viewport" content="width=device-width, initial-scale=1.0">
    <title>Simple Web Page</title>
    <style>
        body {
            font-family: Arial, sans-serif;
            background-color: #f5f5f5;
            margin: 0;
            padding: 0;
            display: flex;
            justify-content: center;
            align-items: center;
            height: 100vh;
        }
        .container {
            text-align: center;
        }
        h1 {
            color: #333;
            font-size: 36px;
            margin-bottom: 20px;
        }
        p {
            color: #666;
            font-size: 18px;
            margin-bottom: 30px;
        }
        .button {
            background-color: #007bff;
            color: #fff;
            border: none;
            padding: 10px 20px;
            font-size: 18px;
            cursor: pointer;
            border-radius: 5px;
            text-decoration: none;
            transition: background-color 0.3s ease;
        }
        .button:hover {
            background-color: #0056b3;
        }
    </style>
</head>
<body>
    <div class="container">
        <h1>Demo For EC2</h1>
        <p>This is a demonstration of deployment of EC2 instances.</p>
        <a href="#" class="button">Get Started</a>
    </div>
</body>
</html>
- Press
Escand:xto save and exit the vim
Restart the Apache Web Server
- Enter the following command to restart the Apache Server
sudo systemctl restart apache2
sudo systemctl restart apache2
Webpage Ready
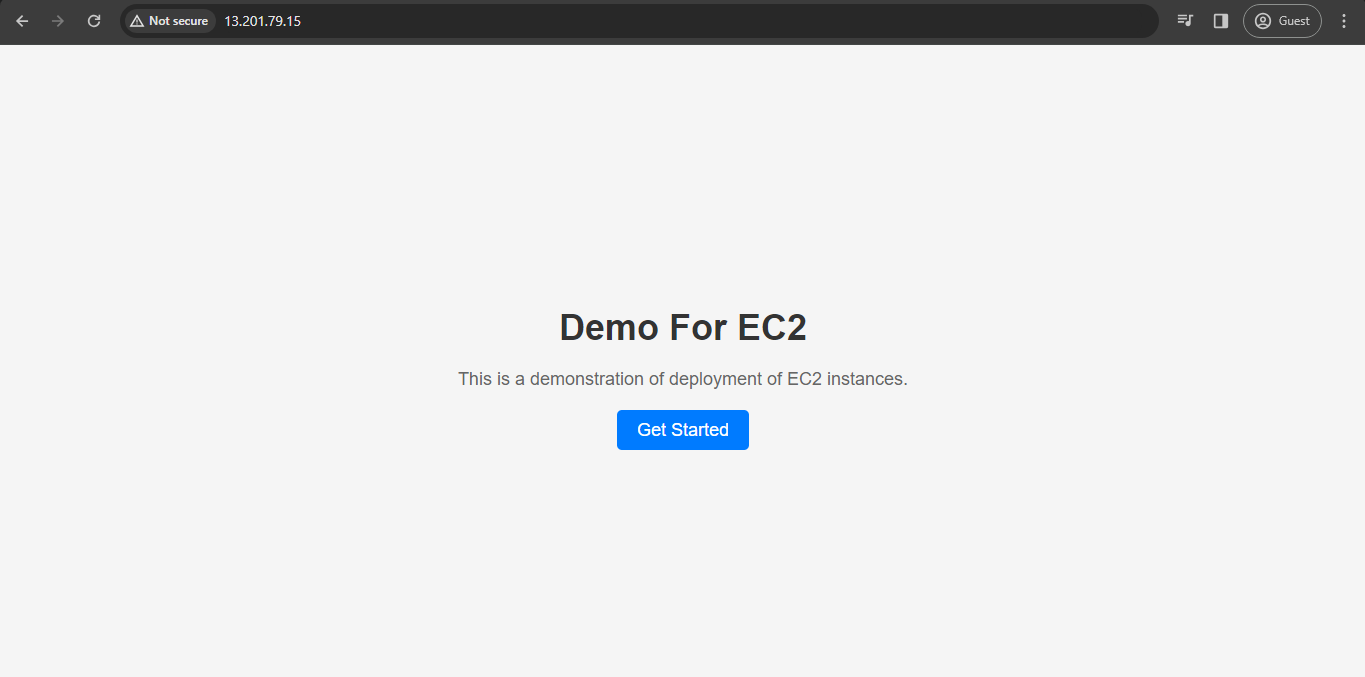
Deployed Webpage
- Once the Apache Server is restarted, take note of the Public Ipv4 address which we discovered earlier and paste it in a browser and you can see the above page
- We successfully deployed a simple web page on an EC2 and thus completing a quick hands-on for EC2
- Make sure to turn off the instance using
Terminate instanceoption, which you can find inInstance Stateoption in this section