- Published on
Create Quick VMs in Proxmox like AWS using Cloud Images
- Authors

- Name
- Tamilarasu Gurusamy
Objective
- Use Proxmox API with Insomnia API Client to programattically create VMs
- Use Cloud images of respective OS and Cloud Init Config to create VMs with custom config
- Use a programming language ( Kotlin ) to streamline the process of creating the VM by getting inputs and creating the VM
- More features coming in future
Table of Contents
- Demo
- Features Not Yet Available
- Proxmox Setup Requirements
- Create VM using Insomnia API Client
- Create VM using Kotlin
Demo
Features Not Yet Available
- Easy way for downloading images / import
- Set node value using user input
- Mention M infront where size values are displayed
- If vm is already created, then it should be ignored
- Add feature for creating manual size
- Remove the delay and add status tracking
- Fedora 39,40 not getting internet ( dns issue )
- Get input for ci user
- Store ssh keys
- Remove dotenv warning
- Use a lightweight DB ( sqlite )
Proxmox Setup Requirements
Get the Proxmox Domain Name
SSH into the Proxmox Instance and open the file
/etc/hostsand find the record associated with the IP that you have assigned the Proxmox InstanceFor Example : Note the one that's like a domain : pve.example.com
10.2.0.6 pve.example.com pve
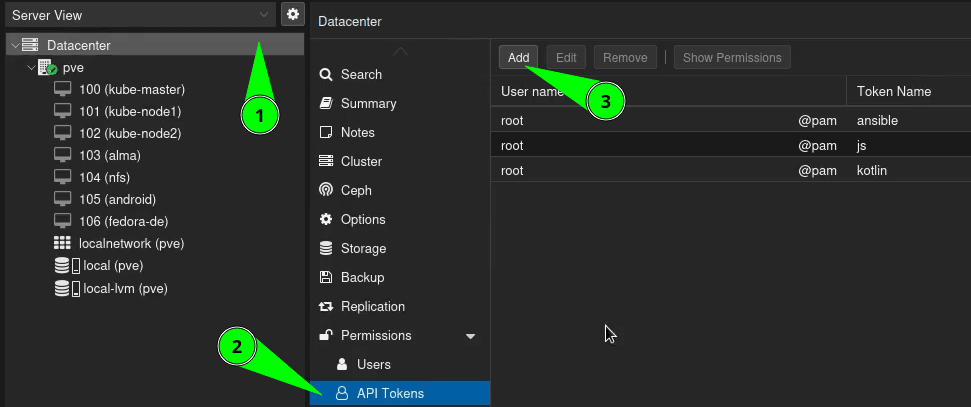
Create API Token
- Login into Proxmox click on the following
- Choose the user as
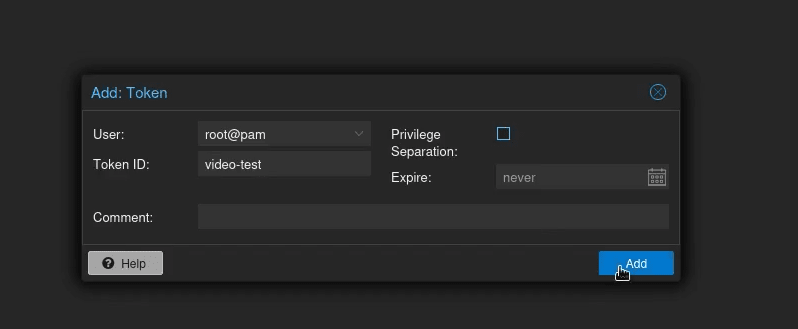
root@pam. Although this is not recommended for production setup, I have used this, so that we will simplify the process by not worrying about required permissions. - Give a name for Token ID.
- Untick the Privilege Seperation and if we need, we can set the expire date for the token.
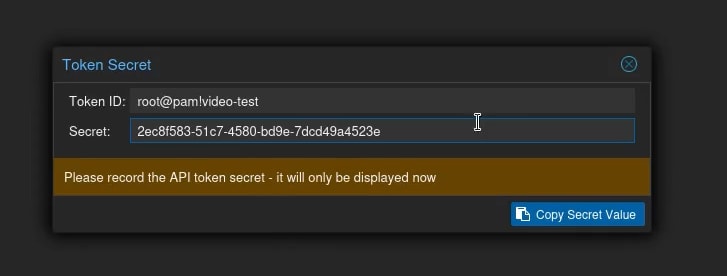
- Then click on Add
- After clicking on Add, we will get a dialog displaying the credentials, keep note both of the values somewhere safe and close the dialog.
Change the Content Type of Proxmox
- Content type of Proxmox is changed so that Proxmox can use different type of file formats for storing the files for eg : qcow2, raw
- Click on local(pve)
- If you haven't changed any of the settings, then you will not notice Import or Snippets.
- We need that for our current objective, so we are going to add it
- Get the shell of the Proxmox
- Open the file
/etc/pve/storage.cfgusing text editor of your choicevim /etc/pve/storage.cfg - Add the words images and import in both the sections i.e local and local-lvm
- Ignore the word snippets for now
- Save and exit the file


Create the import directory and Download Cloud Images
- Navigate to the directory
/var/lib/vz - Create a directory import using the command
mkdir import - The cloud images that we will be downloading will be placed in this directory
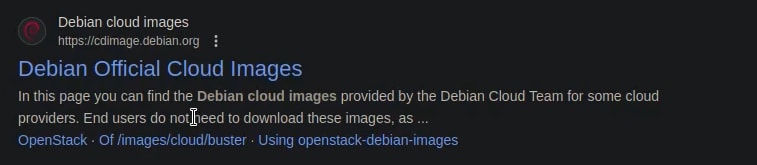
- Now lets download a Debian Cloud Image for example
- Search for Debian Cloud Images on Google
- Click on the link and scroll down to see this section
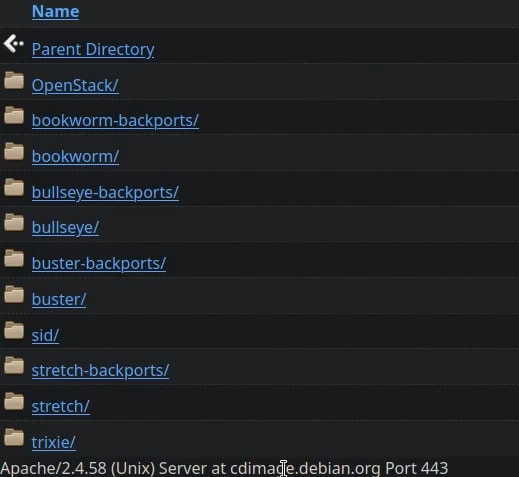
- Choose the version that you want
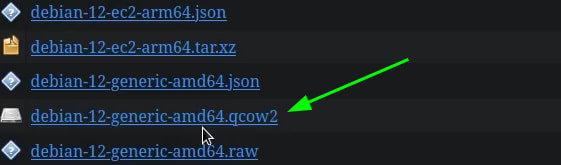
- Choose the latest and download the appropriate file for the architecture that has the extension of .qcow2
- For proxmox choose the generic images
- Copy the link and use
wgetorcurlto download the image and use the import directory that we created earlier - This is just and example and steps of downloading the images may vary for different distro
- Now there are two ways to create the VM
- One is using an API Client to interact with Proxmox API. This step is recommended for users who are trying interact with a language other than Kotlin.
- Other one is using Kotlin language.
- You can find the Table of Contents so that you can move freely between the sections of the blog
Create VM using Insomnia API Client
Insomnia Setup
- We will be interacting with Promox API using Insomnia API client
- We can use other clients to interact, but I have a collection file that is supported in Insomnia which will import all the api reqests that I used to create the VM so that you won't have to create each request manually.
- Download the client by going to Download Insomnia
- Alternatively go to Insomnia Github Releases page and download your required file
- Also download the Insomnia collection file that I mentioned earlier by using this Github Link
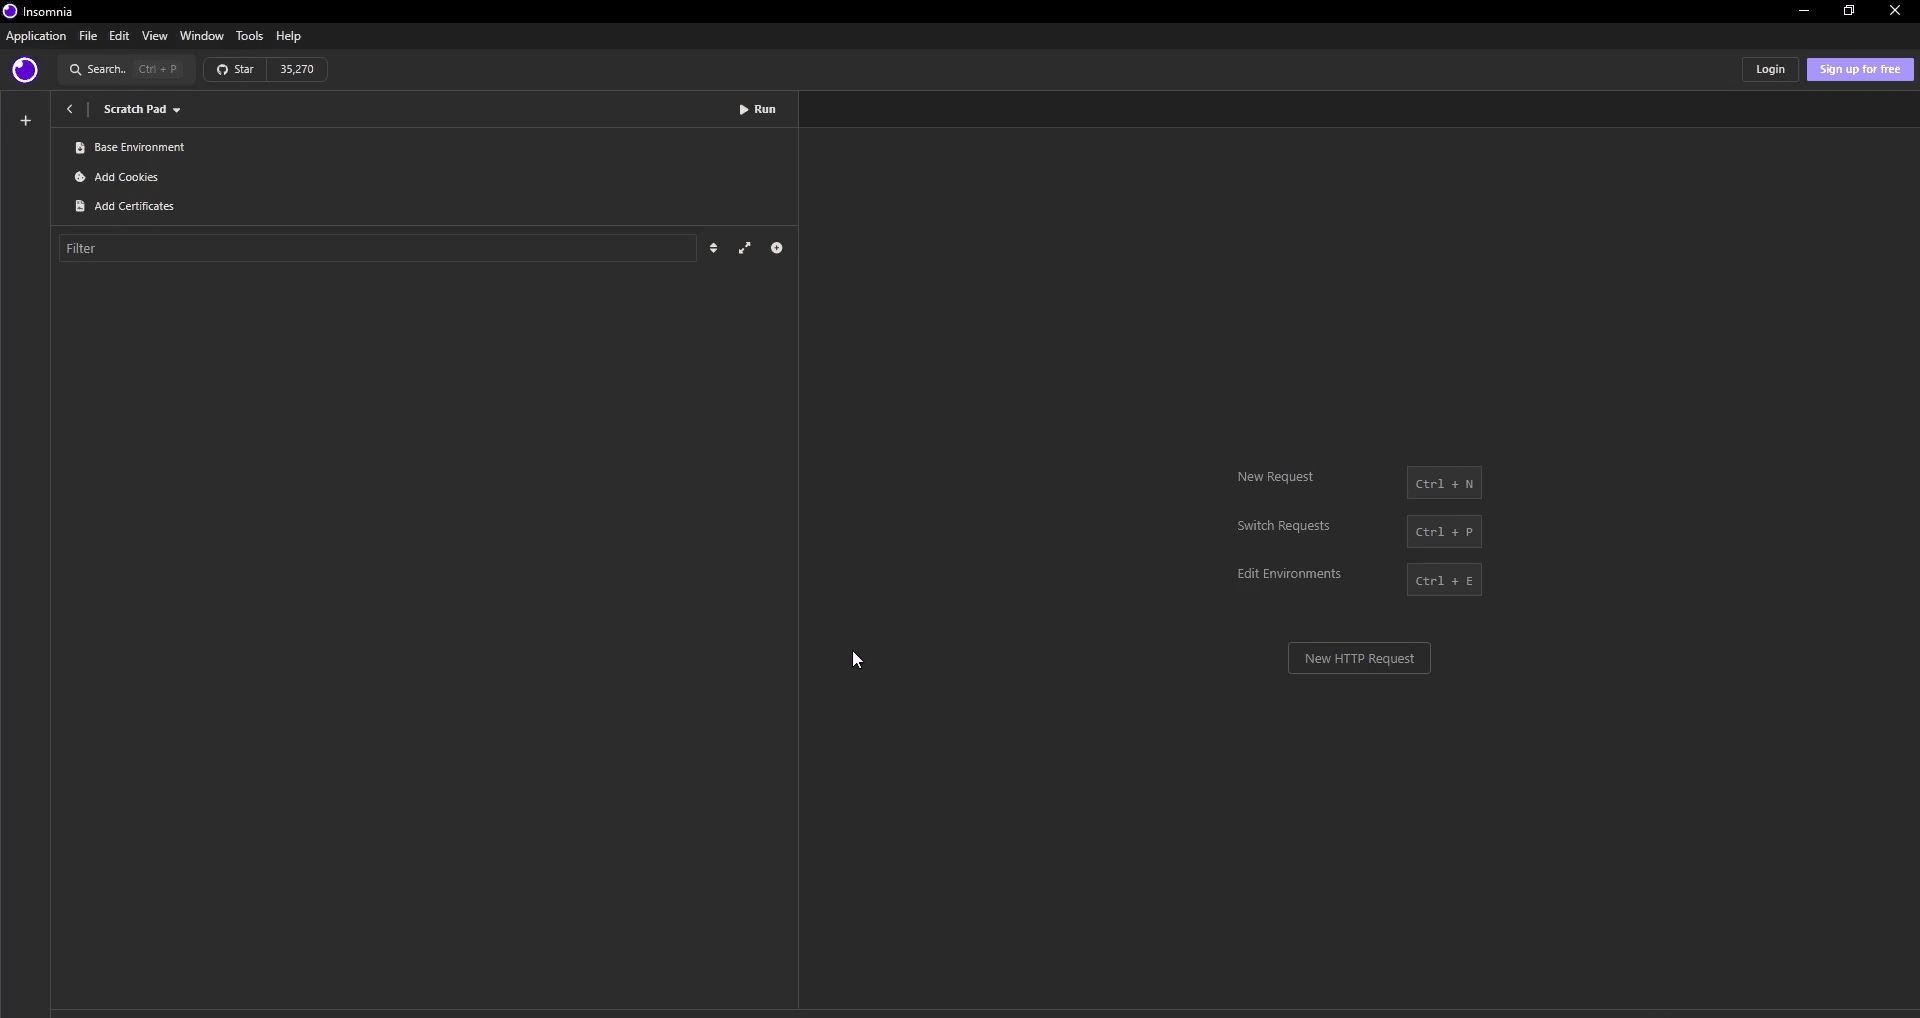
- Install and open the client to see this interface
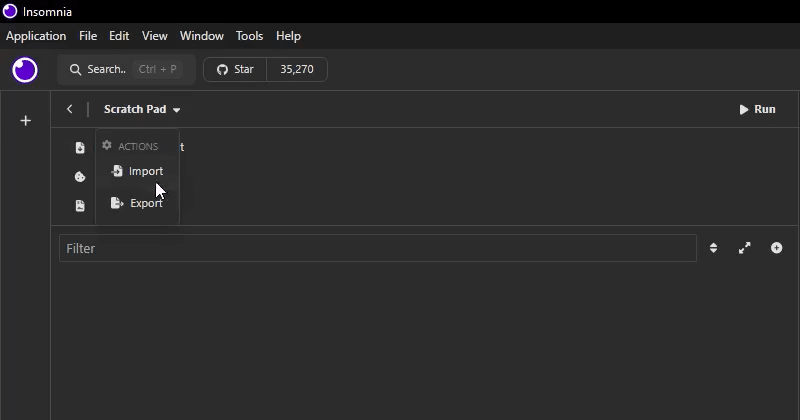
- Click on Scratch Pad and click on Import
- Upload the file that was downloaded earlier i.e Github Link
- Click on Scan and then Import
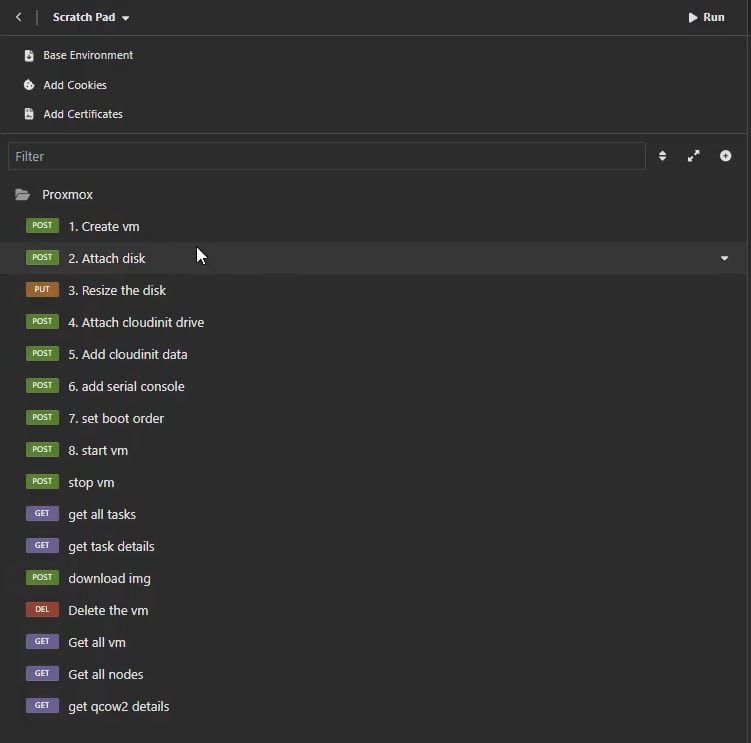
- After importing :
- Before we make requests to the Proxmox API, we have to make some configs
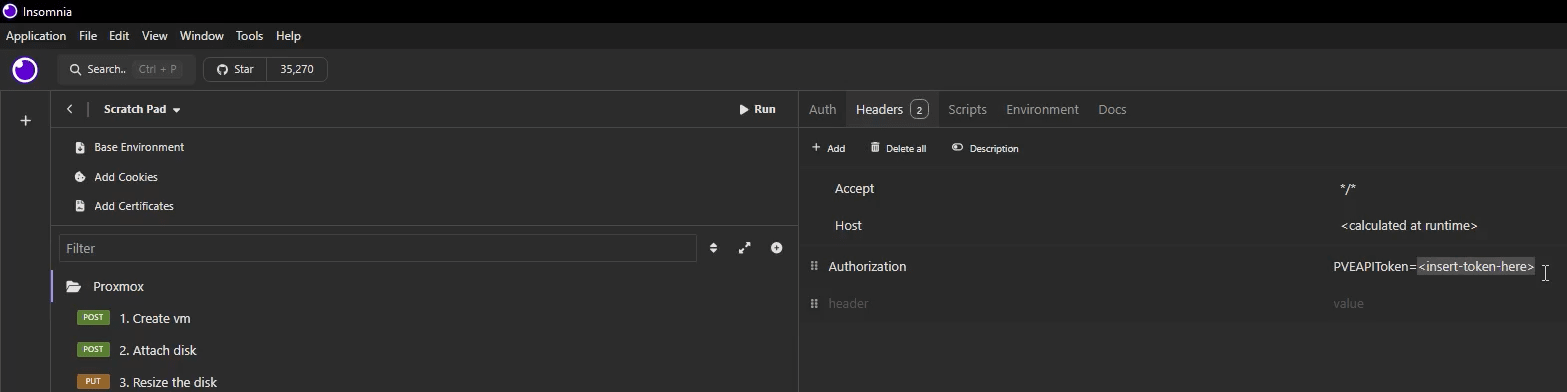
- Click on the Proxmox folder, click on headers and replace the value of the token that we obtained earlier.
- Token should be inserted in this format
TokenID=Secret - For example :
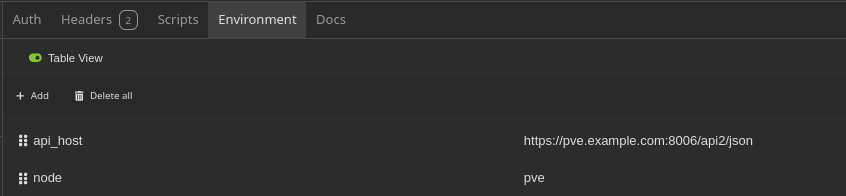
root@pam!kotlin=5c9bd79b-31d2-40a9-81a8-15e2e34c47b2 - Next click on Environment, replace the domain with the domain of the proxmox instance that we obtained earlier.
- Also replace the node value with the name of the node you have.
- To get the name of the node, head to Proxmox Web UI and get the first name under the Datacenter section.
- We have to make sure the domain is resolvable from our host. So we open shell of our system and edit the
/etc/hostsfile - And add the following line
proxmox_api proxmox_domain - For example
10.2.0.6 pve.example.com - Save and exit the file
- Since proxmox uses self signed certificates, it will cause an error in the api client. So we disable it
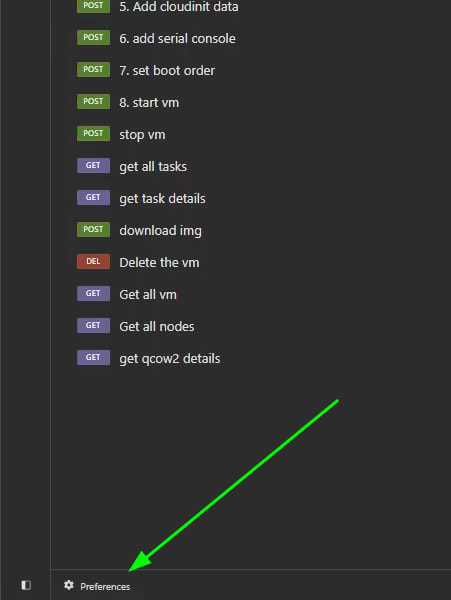
- Click on preferences
- Scroll down and look for Validate Certficates and untick it
- Now all the configs are over and we are ready to send requests.

Send requests to create a VM
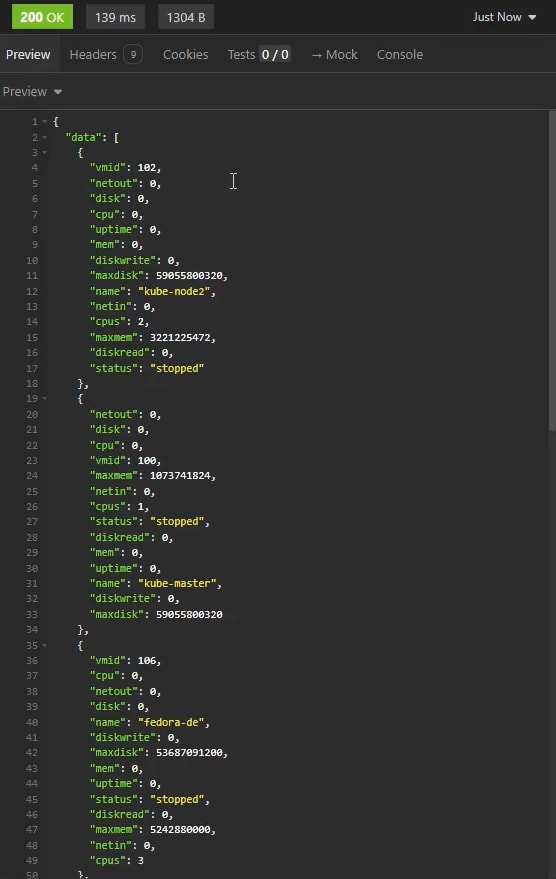
- For a small test, lets start with the simplest request of Get all vm
- Find it and click on send or press
Ctrl + Enter, and we should get the details of all the VMs that are created in the particular proxmox node - With this, we have got a working API client setup. Next we can proceed towards creating a VM
Create a VM
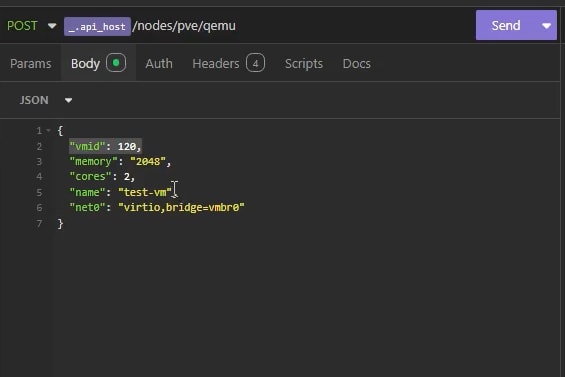
- Click on the first request
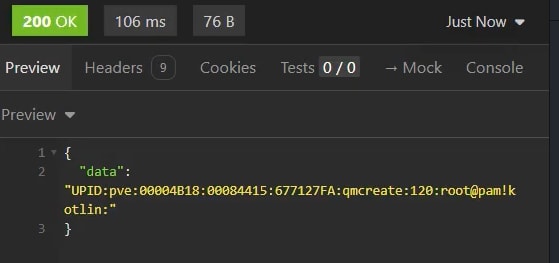
1. Create vm - It uses the POST request on /nodes/node/qemu endpoint to create a vm
- The json body will contain the VM ID, memory ( in bytes ), no of cores, name of the vm, and details for the first virtual network indicated by net0. More can be added simply by adding config for net1, net2 etc.
- Once you have configured the details click on Send
- The response will look like this
- The response contains a task id, which contains the details about the task involved with creating the vm. It doesnt take a lot of time, otherwise we can check the status of that by using the endpoint of
Get task detailspresent in the list.
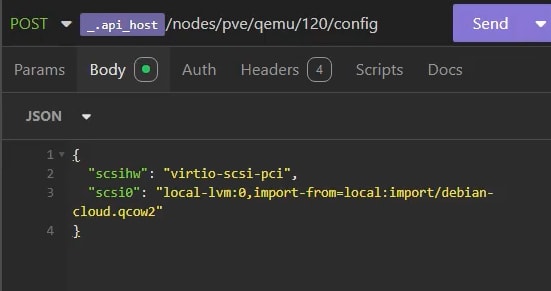
Attach Disk
Now we have to import the disk i.e the cloud image we downloded earlier into the vm
This request uses the POST request on
/nodes/node/qemu/vmid/configendpointThe json body contains type of disk we need specified in scsihw and details of the first disk specified in scsi0
Now the syntax for importing the disk is like this
"scsi0": "local-lvm:0,import-from=local:import/debian-12-genericcloud-amd64.qcow2"You can get more info about the syntax in Proxmox Documentation
Clicking on send will again respond with a task id
Although the response comes quickly with a task id, but the process actually takes some time depending on the size of the image that is being imported.
It doesn't take much time for a file around 3GiB but above that it will take some time and I will recommend to check the status before proceeding to the next step
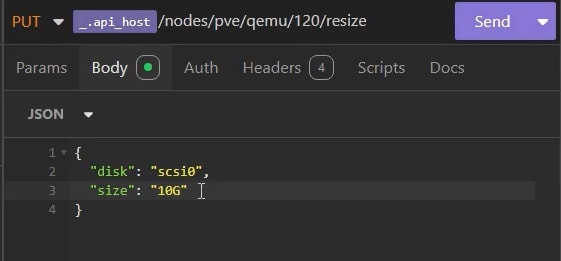
Resize the Disk
- The default size that disk takes up after importing is most of the time very low.
- We can increase it by using the PUT request on the
/nodes/node/qemu/vmid/resize - The json body contains the disk that needs to be resized i.e. scsi0 and size that you finally need. In this case for me its 10G
- The response will be a task id
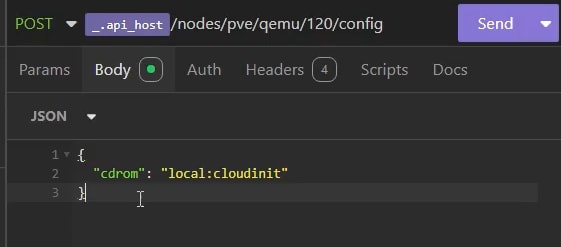
Attach CloudInit drive
This steps add a cloudinit drive which will contain the cloudinit config
Uses the POST request on
/nodes/pve/qemu/vmid/configendpointJson body will contain
"cdrom": "local:cloudinit"
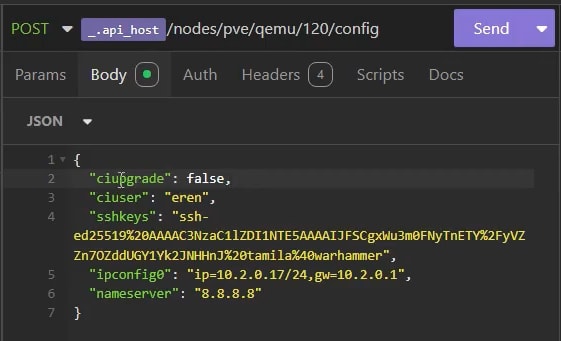
Add CloudInit Data
- This is the step where we add the required details for the vm i.e. username, ssh-public-key for the user, ip details, and optionally nameserver that is the dns server. We also have the option of specifying whether we want to update the vm automatically once it is created.
- Uses the POST request on
/nodes/node/qemu/vmid/configendpoint with the above details - Make sure to url-encode the ssh-public-key before passing it in the request.
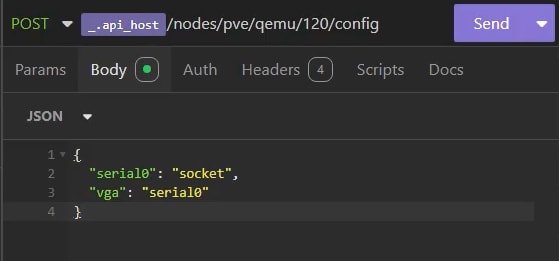
Add Serial Console
- We add a display to the vm so we can see console output
- Uses POST request on
/nodes/node/qemu/vmid/config - Since I dont understand much about this step and literally converted this step from the blog that I referred.
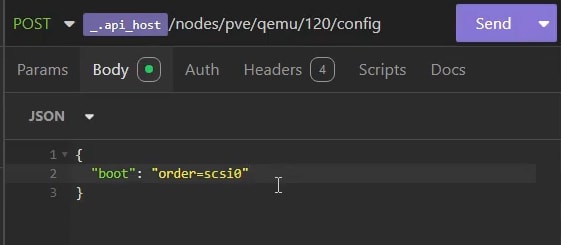
Set Boot Order
- This step is to set the boot order where we specify the first disk to boot is scsi0
Start VM
- Finally we start the vm that we created by using POST request on
/nodes/node/qemu/vmid/status/start - Once we start the vm, we can check by first pinging the vm using the ip address that we configured earlier
ping 10.2.0.17 - Once we start receiving the ping, we can connect to it using the username and private key which is related to the public key uploaded to the vm
ssh eren@10.2.0.17 -i .ssh/debian-vm - With this we have finished with the process of creating VM with the API Client. Now lets move on to using Kotlin to automate the whole process with some more features and user inputs.
Create VM using Kotlin
- For the repo click Here
- We will be using Intellij IDEA for programming with Kotlin. So I'll suggest you to download the Community Version.
- After installing, clone the repository locally and navigate to it.
- Open the local repo using IDEA
- Once opened, it will take some time to download the dependencies and do some indexing so we will wait for that.
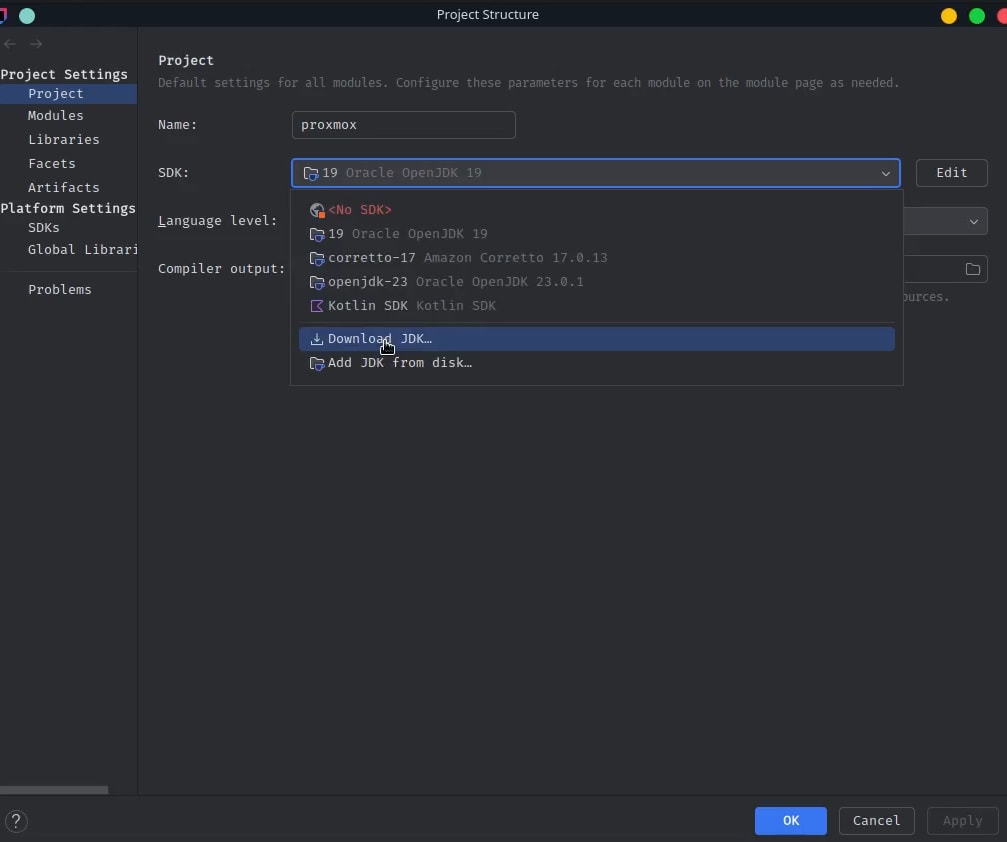
- Before running the project, set the JDK for the project in the settings, by clicking on
File,Project Structureand choose SDK as Oracle OpenJDK 19. If you need other versions, choose below 19 as higher than this version gives errors. - If it does not show any JDK, we can download by clicking on Download JDK
- After setting the JDK, we have to some environment variables, just like we did for the API Client
Set up Dependencies and Environment Variables
- Rename the
.env.examplefile to.envand open the file - Replace the values of API_TOKEN and API_HOST with the appropriate values, just like we did in the api client.
- Next open
Main.ktfile and we need to change some variables here too. - Most important one is node, set the value to the name of the node present in your proxmox instance
- If you didn't changes any settings for the storage devices other than content type, leave the rest of the settings as default.
- Also change the ciuser if you need, its the username that will be present in the vm
- Make sure you have downloaded the required images you need.
- For now make sure the names of the images match with the names in the Kotlin file, as I have not added any exception handling for the file not present cases.
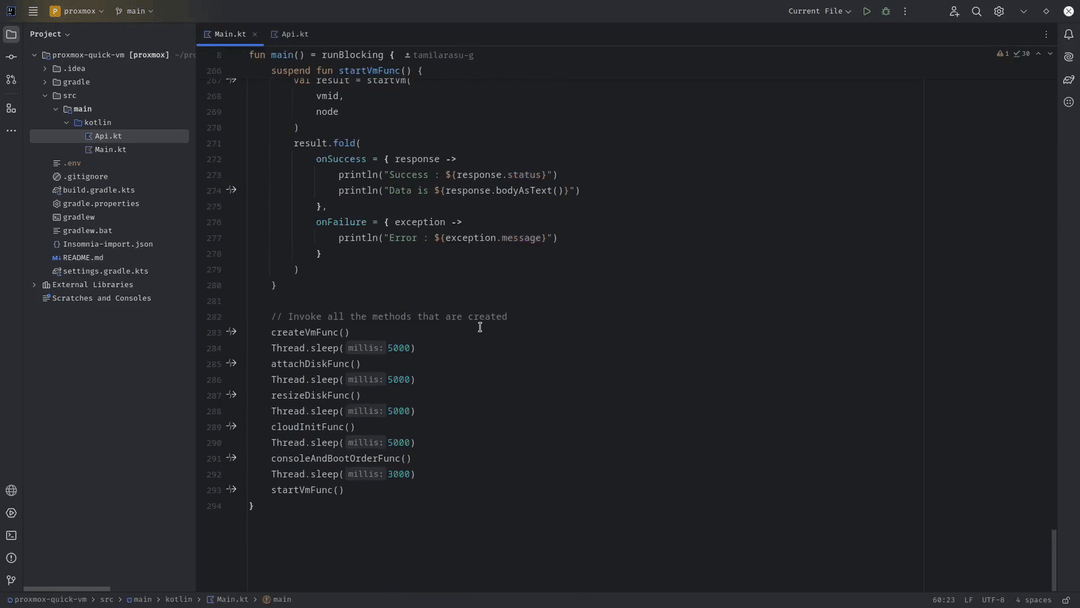
Understanding Kotlin Code
- There are two files that are responsible for all the actions -
Api.ktandMain.kt Api.ktfile contains the code that actually interacts with the Proxmox API, and exports functions to be used.Api.ktalso has the necessary functions for dealing with the self signed certificate.Main.ktfile contains the code for user inputs and functions that imports the function defined inApi.ktand provides them with required parameters.- I have created a function for each API call we made in the client.
- I have added delay after each function to make sure that each process is completed, which would be more efficient if I just added checking status with task id. I have mentioned that in this Section.
- I would like to explain it more, but will do it in a future version when I have refactored the code, considering I'm still a beginner to Kotlin.
- As always you can take a look at it yourself and make changes to meet your needs.
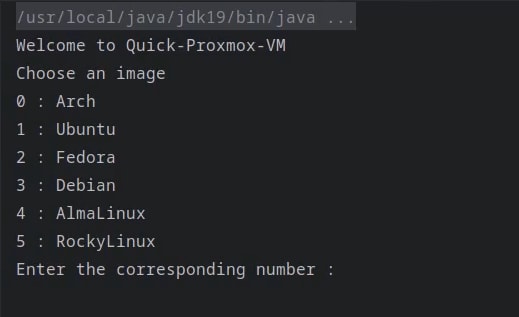
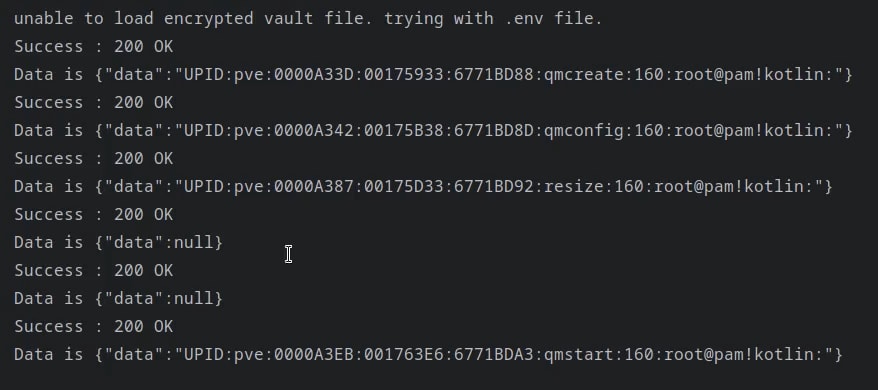
Create VM
- Once everything is setup, press
Shift + Fn10or click on Run button - We will get the output similar to this :
- Choose the required distro.
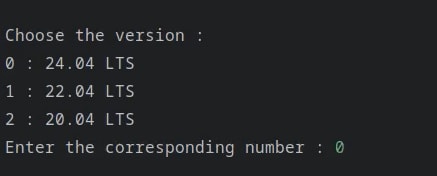
- Next choose the version
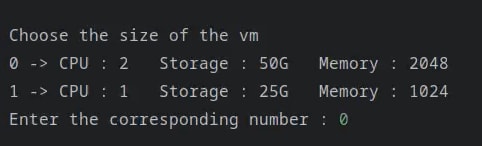
- Next choose the size of the vm
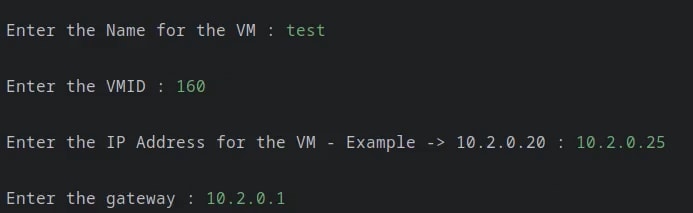
- Enter the SSH public key as URL Encoded
- Enter name for the vm, ip address, gateway
- Now the vm will be created
- Now that the vm is created, we can ssh using the username and the ip address that we configured.
- With this we have reached the conclusion of creating vm with Kotlin
- All the resources I have used for this project are mentioned in the Repo