- Published on
Setup Jenkins on Ubuntu with Apache and SSL
- Authors

- Name
- Tamilarasu Gurusamy
Objective
Install Jenkins
We will be using an EC2 instance with Ubuntu as the AMI to run the Jenkins master as well as the Jenkins Agent
Once the EC2 instance is created, update the system using the following command
sudo apt update && sudo apt upgrade -yThe Jenkins docs has instructions for installation of jenkins on major linux distributions.
For ubuntu enter the following commands
sudo wget -O /usr/share/keyrings/jenkins-keyring.asc \
    https://pkg.jenkins.io/debian-stable/jenkins.io-2023.key
echo "deb [signed-by=/usr/share/keyrings/jenkins-keyring.asc]" \
    https://pkg.jenkins.io/debian-stable binary/ | sudo tee \
    /etc/apt/sources.list.d/jenkins.list > /dev/null
sudo apt-get update
sudo apt-get install jenkins
Next we need to install java, since jenkins requires java to run
Install Java 17 using following command
sudo apt update
sudo apt install fontconfig openjdk-17-jre
After installing, check if Java is installed correctly using the command
java --versionIf it displays the version without any errors, congratulations you have installed Java successfully
Now we need to start Jenkins and also make sure that it starts up on Boot. Use the following command for that
sudo systemctl enable --now jenkinsIf you encounter an error while enabling or starting the service for the first time, try rebooting the server and then check the status of the jenkins service
Next check the status using
sudo systemctl status jenkinsAfter verifying that Jenkins is running without any errors, navigate to http://localhost:8080 or http://remote-server-ip:8080 if you are installing Jenkins on a remote server
We will land at a page that says Unlock Jenkins
As it says on the page, to find the Administrator Password, cat the file
/var/lib/jenkins/secrets/initialAdminPasswordusing sudo, paste the password and click on ContinueThe next screen will ask about whether
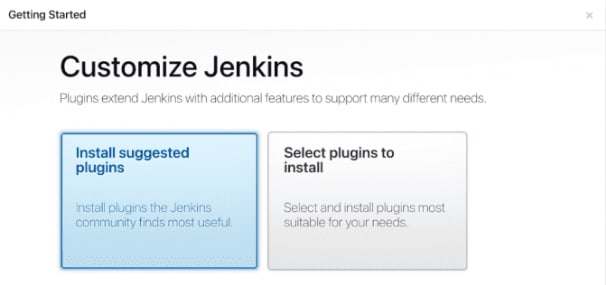
- Install suggested plugins or
- Select plugins to install
If not sure about which options or plugins to choose, go with the first option Install suggested plugins
The next screen will be the interface to create an admininstrator user, enter the required details and click Save and Finish
When asked for the instance url, enter the domain that you will be using to access jenkins, for eg :
https://subdomain.domain.comThen click on Start using Jenkins

Setup SSL
- To setup a web server that will also handle the ssl part, we will use apache. We also need several other packages with that for the apache to function properly. Install it using
sudo apt install apache2 php-curl php-xml libapache2-mod-php php-cli php-mbstring php-bcmath php-tokenizer php-zip -y - Next we will get the wildcard certificates for our domain, so that we dont need to get a new certificate every time, we want a ssl certificate for a new service. For that we install certbot.
- Install certbot and other related packages using the following command
sudo apt install certbot python3-certbot-apache -y - Get the wildcard certificate for the domain using the following command
sudo certbot certonly --manual --preferred-challenges=dns --email admin@example.com --server https://acme-v02.api.letsencrypt.org/directory --agree-tos -d *.your-domain.com - Next, we will receive a txt record to be added to our domain, after adding the txt record press Enter
- This step will only get the certificates and place in the directory of
/etc/letsencrypt - We need to utilise the certificate in our apache config file whenever we write a new apache vhost
- Now we will create the apache vhost. Navigate to the directory of
/etc/apache2/sites-available/ - Create a new file named your-subdomain.your-domain.com.conf using sudo and open it
sudo vim your-subdomain.your-domain.conf - Paste the following configuration
<IfModule mod_ssl.c> <VirtualHost *:443> ServerName your-subdomain.domain.com ProxyRequests Off ProxyPreserveHost On AllowEncodedSlashes NoDecode <Proxy *> Order deny,allow Allow from all </Proxy> ProxyPass / http://localhost:8080/ nocanon ProxyPassReverse / http://localhost:8080/ ProxyPassReverse / http://your-subdomain.domain.com/ RequestHeader set X-Forwarded-Proto "https" RequestHeader set X-Forwarded-Port "443" RewriteCond %{HTTP:Upgrade} websocket [NC] RewriteCond %{HTTP:Connection} upgrade [NC] RewriteRule ^(.*) "ws://localhost:8080/$1" [P,L] # Redirect http to https RewriteEngine On RewriteCond %{HTTPS} off [OR] RewriteCond %{HTTP_HOST} ^www\. [NC] RewriteCond %{HTTP_HOST} ^(?:www\.)?(.+)$ [NC] RewriteRule ^ https://%1%{REQUEST_URI} [L,NE,R=301] #LogLevel info ssl:warn ErrorLog ${APACHE_LOG_DIR}/jenkins_error.log CustomLog ${APACHE_LOG_DIR}/jenkins_access.log combined # SSL Engine Switch: SSLEngine on # A self-signed (snakeoil) certificate can be created by installing # SSLCertificateFile directive is needed. SSLCertificateFile /etc/letsencrypt/live/your-domain.com/fullchain.pem SSLCertificateKeyFile /etc/letsencrypt/live/your-domain.com/privkey.pem SSLCACertificateFile /etc/letsencrypt/live/your-domain.com/chain.pem <FilesMatch "\.(cgi|shtml|phtml|php)$"> SSLOptions +StdEnvVars </FilesMatch> <Directory /usr/lib/cgi-bin> SSLOptions +StdEnvVars </Directory> </VirtualHost> </IfModule> - Next we need to enable php modules, for eg: proxy_http, headers etc..
sudo a2enmod proxy_http ssl headers php8.3.6 proxy_wstunnel - Make sure to match the version of the php, if you encounter an error. Check the version using
php --version - Now we enable the site using the command
sudo a2ensite your-subdomain.your-domain.com.conf - Dont forget to point the domain to the ip address of the instance where your jenkins is hosted
- Now that the jenkins site is protected with SSL, the next step is to add an agent to the Jenkins master
Add an Agent to Jenkins Master
Login to the Jenkins UI using the previously set credentials
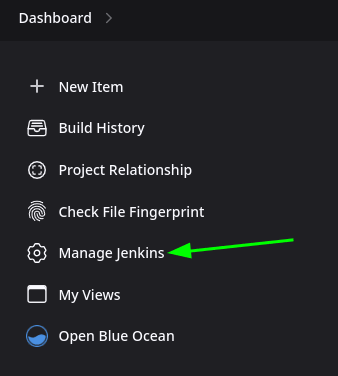
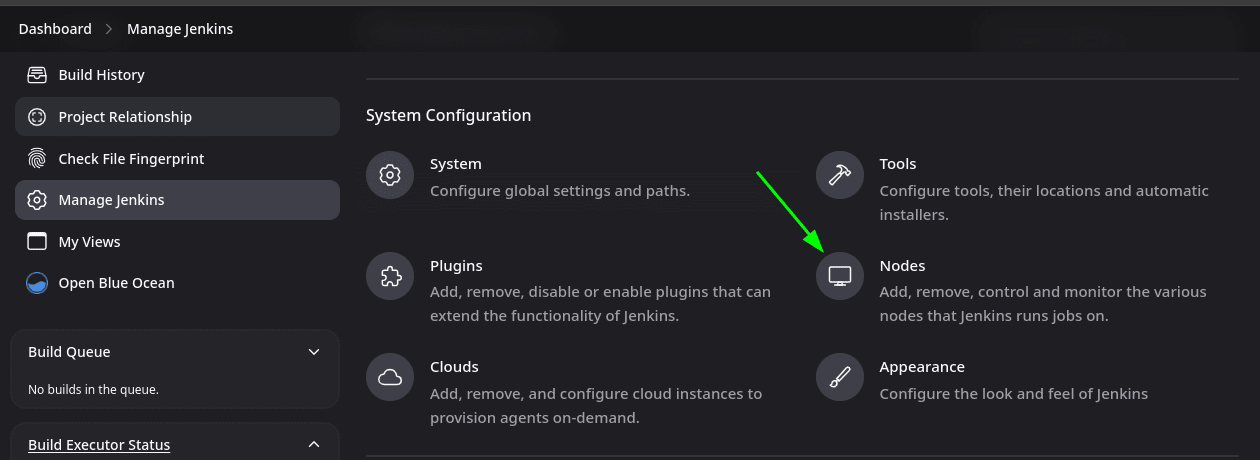
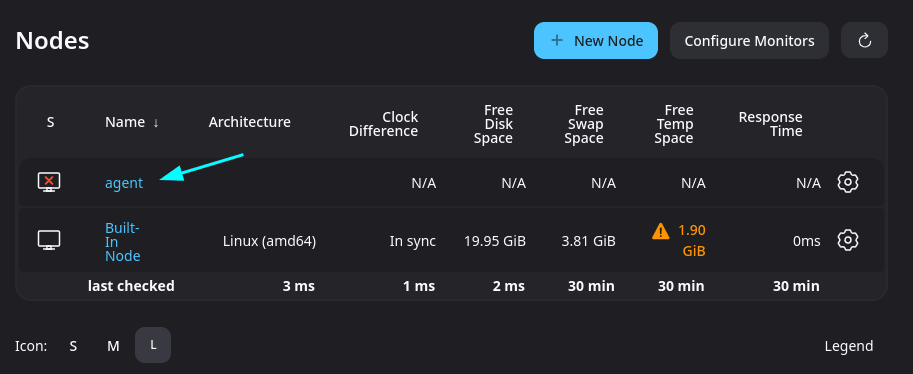
Click on Manage Jenkins, then Nodes
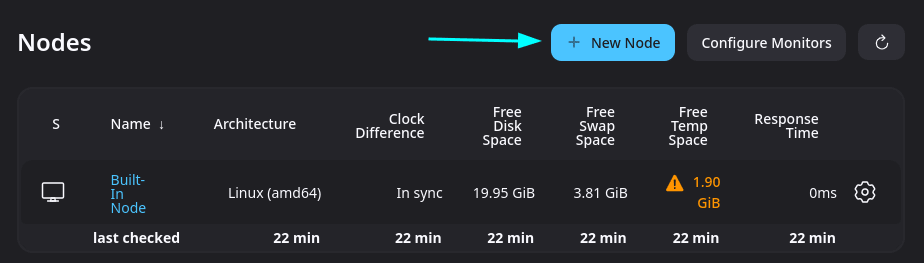
Click on New Node
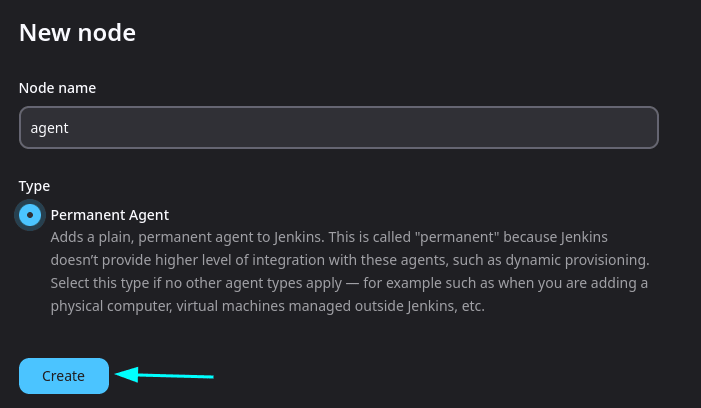
Give a name for the node
Choose the type as permanent node
Set the Remote root directory ( this is where all the build files, logs and other resources of jenkins will be stored ). Make sure the jenkins user has permissions to access and create files in this directory
Label are used to identify the node, so that a job is run on particular node. Give a label for the node ( I'll give it "agent")
Keep the rest of the options as default
Click on Save
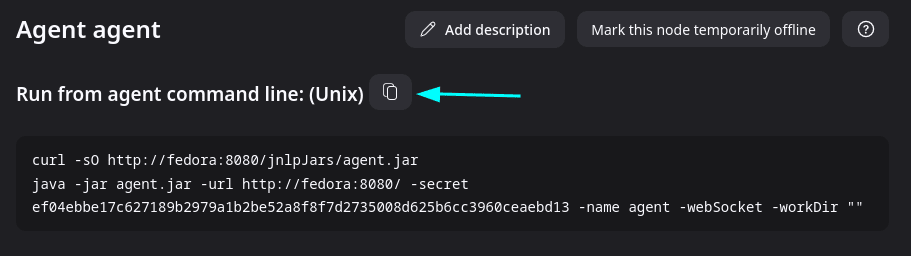
Click on agent
Copy the command that is presented. The command will download a agent file from the jenkins master and then execute it
We need to run this command on agent to make the connection, but if the agent reboots or the process stops, the connection won't be persistent
To make the connection persist even after reboot, we will create a service file that will execute the command and then we can manage it using systemd commands
Create a directory at
/usr/local/jenkinsand change the ownership of the directory to the jenkins usersudo mkdir -p /usr/local/jenkins-service sudo chown jenkins /usr/local/jenkins-serviceMove into that directory and create a file named
start-agent.shand paste the following lines#!/bin/bash cd /usr/local/jenkins-service <Replace with the command that was previously displayed on jenkins master> exit 0Make the script executable by using the command
chmod +x start-agent.shNow to create a service file, navigate to
/etc/systemd/systemand create a file jenkins-agent.service using sudo and paste the following lines[Unit] Description=Jenkins Agent [Service] User=jenkins WorkingDirectory=/home/jenkins ExecStart=/bin/bash /usr/local/jenkins-service/start-agent.sh Restart=always [Install] WantedBy=multi-user.targetEnable and start the service using the command
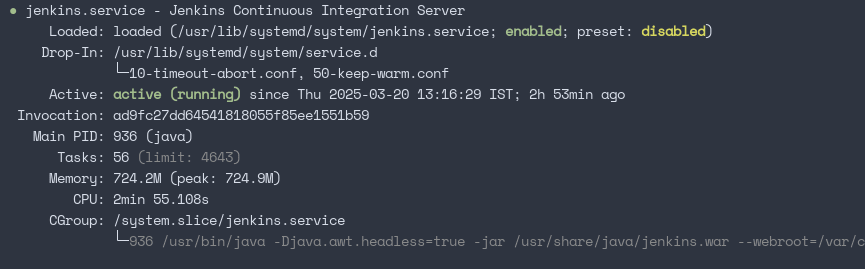
sudo systemctl enable --now jenkins-agentCheck the status of the agent using the command
sudo systemctl status jenkins-agentIf the logs contain the word Connected, then switch to Jenkins master and navigate to nodes section, we can see the stats of the agent
With this, we have an ideal setup of Jenkins master with HTTPS access and an agent that can run builds.